You‘ve been watching the stacker for the last hour. Every few boxes, a customer return floats into your mind—the last batch that fell apart at the filling station because the glue didn’t hold. The line is running, but the glue pattern looks wrong. Too thin on some panels, gummy on others. Skipping like a kid‘s jump rope. You’ve already wasted a hundred boxes trying to dial it in.
Here’s what frustrates most operators: inconsistent glue lines rarely have a single obvious cause. You adjust the wheel gap, and the skip moves to a different panel. You change the glue, and the line gets thicker—but not more even. The machine isn‘t broken; the settings are just fighting each other.
This guide walks you through a systematic approach to diagnosing glue line inconsistency on a folder-gluer for corrugated box. You’ll start with visual classification—what the glue pattern actually looks like—then work through the glue delivery system, the applicator assembly, the board itself, and finally the environmental factors that mimic machine failure. Most issues resolve within an hour, without a service call.
First, visually classify the glue line anomaly
Before you touch a single adjustment, look at what the glue line is actually doing. Different patterns point to different root causes. Misdiagnosis is the most common reason fixes don’t work.
The “skipping rope” pattern — intermittent gaps across the line
The glue line looks like a dashed line rather than a solid stripe. Adhesive appears, disappears, appears again. This pattern typically means the glue wheel isn‘t making consistent contact with the box flap.
Most common causes: wheel runout (the wheel isn‘t perfectly round), contaminated board surface with dust or release agents, or glue that’s too thick to flow into the applicator at the required rate. If the glue wheel is dirty or worn, it won‘t transfer the glue evenly.
Quick diagnostic: rotate the glue wheel slowly by hand while listening and feeling for uneven resistance. A wheel that “catches” at one point in the rotation is eccentric.
The “thick & thin” pattern — varying line width across the run
One foot of the run has a heavy glue line; the next foot has almost nothing. The width oscillates. This pattern points to the glue delivery system, not the wheel.
Primary suspects: the glue pump is fluctuating (worn diaphragm, inconsistent drive speed), the supply line has an air lock, or the gap setting between the wheel and the scraper blade is wrong.
The gap between the glue wheel and the material determines how much adhesive applies. Too large a gap leaves dry spots; too small a gap causes squeeze-out onto machine surfaces. If the gap is inconsistent across the wheel width, you get thick-thin variation.
The “smudged” line — messy, spread, or dragged adhesive
The glue isn‘t staying where it belongs. It’s smearing onto adjacent flaps, dripping off the wheel, or leaving a trail behind the applicator.
This pattern usually means one of three things: excessive glue volume (the pump is pushing too much material), glue viscosity is too low (it runs like water and spreads uncontrollably), or the timing is off—the wheel is applying glue too early or too late relative to the flap position.
If the machine is running too slowly, the glue has more time to build up on the applicator, leading to drips and smudges. For large boxes, glue viscosity is often the most recurring root cause of quality defects.
Glue on the wrong flap — adhesive where it shouldn‘t be
The glue line is perfectly consistent—it’s just on the wrong panel entirely. The wheel is applying adhesive to the flap that should stay clean.
This is a positioning problem, not a glue volume problem. Cause: misaligned glue wheel relative to the box path, or incorrect side guide settings that allow the box to drift during feed.
A wheel that is offset by even 2mm can deposit glue on the wrong surface for every box in the run.
Below is a quick reference table for pattern-to-cause matching:
| Glue Pattern | Primary Suspect | Quick Check |
|---|---|---|
| Skipping rope (intermittent gaps) | Wheel runout or board contamination | Rotate wheel by hand; feel for unevenness |
| Thick & thin (width oscillates) | Pump fluctuation or wheel gap | Check supply line for air locks |
| Smudged / messy | Excessive volume or low viscosity | Reduce pump output; check glue temp |
| Wrong flap coverage | Wheel misalignment | Run a test box and trace glue landing area |
| Consistently weak / transparent | Low pressure or worn wheel | Perform lap-shear test on sample |
| Glue only at start of run | Air-locked supply line | Bleed the return line |

The glue delivery system — your first checkpoint
Before you blame the machine‘s mechanicals, verify that the glue is actually getting from the tank to the applicator in consistent condition. Start here because these checks are fast and low-cost.
Clean the filter — most common hidden cause
Most operators check the tank level. Far fewer inspect the filter between the pump and the applicator. A partially clogged filter reduces flow without setting off any alarms. The symptom comes and goes: strong glue line for a few hundred boxes, then thin and weak, then strong again.
Weekly filter cleaning should be standard. Remove the element, flush it with warm water, and reinstall. If the filter is more than three months old, replace it outright.
Verify the pump diaphragm is intact
If your machine uses a diaphragm pump (common on automatic folder gluers), a small tear or pinhole in the diaphragm produces pressure loss and inconsistent output. The pump will sound “labored” or will run constantly without building steady pressure.
Replace the diaphragm every 12 months or at the first sign of output fluctuation. It’s a low-cost part that fails gradually—you often don‘t notice the decline until you put a new one in.
Bleed the return line — air locks kill consistency
Air trapped in the glue supply line compresses and expands with each pump cycle. The result is unpredictable glue volume—sometimes too much, sometimes not enough.
Most systems have a bleed valve or a return line that releases trapped air. Crack it open while the pump is running until you see a steady stream of glue with no bubbles, then close it. This simple step resolves many “mystery” inconsistent glue issues.
Check the strainer on the pickup tube
If the glue tank has a pickup tube with a foot strainer, that strainer can become clogged with dried glue skin or debris from the bottom of the tank. A fully clear pickup path is non-negotiable.
Drain the tank, remove the pickup tube, and inspect the strainer. Clean it with a soft brush and warm water. For tanks without a bottom drain, this should be done monthly.
The glue wheel and applicator — where precision matters
Once you’ve confirmed the glue supply is consistent, move downstream to the applicator assembly. This is where many adjustments go wrong.
Setting the correct gap between glue wheel and scraper
The wheel picks up glue from a reservoir or nozzle, and a scraper blade (sometimes called a metering blade) wipes excess glue off the wheel‘s surface. The gap between the scraper and the wheel determines how thick the glue film is on the wheel before it contacts the box.
A rule of thumb for corrugated boxes: the glue film thickness should be roughly 0.1–0.3mm, depending on the flute structure. For thicker double-wall or triple-wall board, you may need slightly more glue volume. Adjust the gap in very small increments—one-eighth of a turn at a time—and run a test box after each adjustment.
If the glue line looks starved even with maximum pump output, the scraper gap may be too narrow. If the line looks heavy and smudged, the gap may be too wide.
Checking wheel eccentricity — the simple hand test
Even a new glue wheel can have slight runout. Over time, wear in the bearing shaft or mounting bracket makes it worse.
Turn the machine off and lock it out. Rotate the glue wheel slowly by hand while keeping a fixed reference point—a piece of masking tape on the frame works. Listen for scraping sounds. Feel for resistance that changes through the rotation.
If the wheel touches the scraper at one point in the rotation but not at another, the wheel is eccentric. Replace the wheel or the bearing assembly. A wheel that wobbles will never produce a consistent glue line.
Wheel surface condition — clean or replace
A glue wheel with dried adhesive on its surface will not transfer glue evenly. Use a mild solvent recommended by the machine manufacturer to remove buildup.
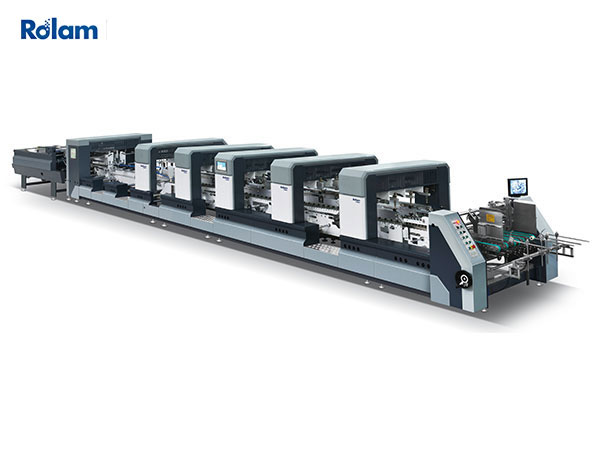
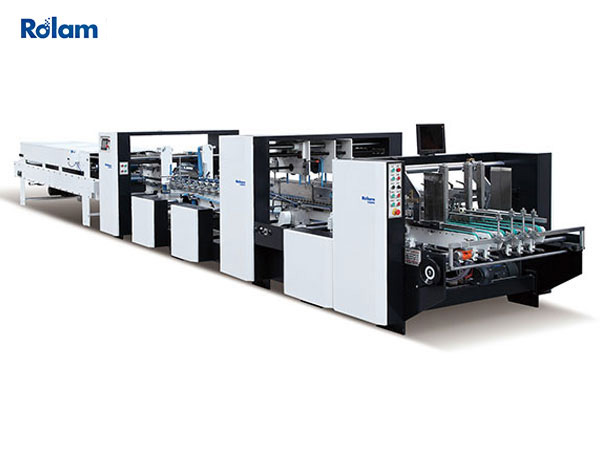
If the wheel surface is worn smooth or pitted, no amount of cleaning will fix it. Replace the wheel. On Rolam‘s SP SERIES folder gluer, wear parts including glue wheels are available for fast delivery, with one-on-one technical support for installation guidance.
Board and environment factors that mimic machine failure
Sometimes the machine is perfectly adjusted, but the glue line is still inconsistent because of something outside the machine.
The “invisible” release agents on some boards
Corrugated board from certain suppliers—especially board that has been stored near chemical treatments or has high residual humidity—may have invisible release agents on the surface. These agents prevent adhesive from wetting out properly.
The glue line will look fine immediately after application, but the bond fails within minutes. Or the glue will “ball up” on the board surface rather than spreading.
Test by running the same box material on a different machine, or by cleaning a small sample board surface with isopropyl alcohol before gluing. If the cleaned sample bonds but the uncleaned sample does not, you‘ve identified the problem. Switch to a different board supplier or add a corona treatment station upstream.
How low shop-floor temperature thickens glue
Water-based adhesives become significantly more viscous in cold temperatures. At 10°C, the same glue that flows perfectly at 25°C may be too thick to pump reliably.
If your glue line inconsistency appears only in the morning and resolves by mid-day, temperature is the most likely factor. The glue tank may need a heated jacket, or the floor temperature needs to be raised.
Check the manufacturer’s recommended temperature range for your specific adhesive. A simple rule: if you can‘t comfortably keep your hand on the glue tank for 10 seconds, it’s too cold for consistent application.
A systematic troubleshooting sequence
Instead of randomly adjusting everything, follow this order. Start with the easiest checks and move toward the more involved ones.
Start with the simplest variable — inspect the glue batch itself. Check the batch number and age. Glue older than six months or stored improperly may have separated or degraded. Replace it with fresh adhesive from a known-good batch and run a test.
If fresh glue doesn‘t solve the problem, move to the glue delivery system. Pull the filter. Clean it or replace it. Bleed the supply line of air. Check the pump diaphragm. These three checks take fifteen minutes and resolve about 40% of inconsistent glue issues.
If the glue delivery checks out, run a glue pattern test at slow speed. Set the machine to 50% of normal operating speed. Run twenty boxes and inspect each glue line under good lighting. Is the pattern still inconsistent? If the inconsistency disappears at slow speed, the problem is speed-dependent—likely wheel inertia or pump response time.
If the inconsistency persists at slow speed, check the wheel assembly. Rotate the wheel by hand to feel for eccentricity. Clean the wheel surface. Adjust the scraper gap. Verify the wheel is aligned with the box flap path.
If nothing has worked, inspect the board itself. Try a different batch or type of board. If the problem goes away with a different board, you‘ve found the culprit—the board has a surface issue.
Document everything. Write down each adjustment you made and the result. Over time, this log becomes your machine‘s custom reference guide for different board types, glue batches, and job requirements.
FAQs on glue line consistency
Q: Why does the glue line look fine immediately after application, but the bond fails later?
A: This points to one of two causes. First, the glue is drying too quickly (low humidity or high temperature in the compression section) before the adhesive has time to wet out into the board fibers. Slow the line speed or add moisture to the compression section. Second, the board surface has a release agent that only becomes apparent after the glue sets. Bond failure in the drying tunnel is the signature of surface contamination—not insufficient glue volume. Run the test described earlier with a cleaned board sample to isolate surface contamination from machine settings.
Q: Can I use the same glue line settings for coated and uncoated board?
A: No — and this is a common source of quality variation. Coated board (such as PE-coated or UV-coated sheets) has a non-porous surface that resists adhesive penetration. You typically need a lower glue volume but a longer drying time to avoid starving the bond. Uncoated board absorbs glue quickly, which means you may need higher volume to keep the adhesive from wicking away before the bond forms. Always run a setup test when switching between coated and uncoated materials. The wheel gap and pump pressure that work perfectly for brown kraft will likely fail with coated white board.
Q: How often should I replace the glue wheel?
A: Depends on run time. A typical schedule for a machine running two shifts, five days per week: replace the rubber or urethane surface every 6–12 months, and replace the entire wheel assembly every 2–3 years. Look for visible glazing (shiny, hard surface) or cracking. A wheel that is still transferring glue but leaving a “striped” pattern—with glue only in the center of the flap and missing on the edges—has worn unevenly and needs replacement. Worn nozzles or rollers should also be replaced promptly to prevent excessive glue application and uneven distribution. For Rolam‘s SP SERIES, wearing parts including glue wheels are available for fast delivery with on-demand replacement support.
When to call for support vs. when to fix in-house
Not every glue inconsistency requires a technician. Here‘s a simple decision guide.
You can handle these in-house: filter cleaning, pump bleeding, wheel gap adjustment, scraper blade cleaning, tank refill, minor speed adjustments, and running a fresh glue batch. The checks outlined above cover the majority of everyday glue issues.
Call support when: The glue line inconsistency persists after you’ve worked through the complete troubleshooting sequence. You suspect the servo drive parameters are corrupted. The machine‘s electronic sensors or control logic appears faulty. The glue wheel assembly has structural damage (cracked housing, bent shaft). Or you’ve replaced every wear part and nothing improved.
For Rolam‘s SP SERIES Automatic Double Splicing Folding Gluing Machine, service support is available via remote technical guidance, video tutorials, and optional on-site assistance. The machine’s advanced auto-splicing system uses dual sensors for large and small carton detection, supporting both single and double sheet feeding with a one-button setup function that simplifies changeovers. Before calling, gather this information: glue type and batch number, board type (single-wall vs. double-wall, coated vs. uncoated), line speed when the error occurs, and any recent part replacements. This data will help support diagnose the root cause faster—and may save you a service visit altogether.
Struggling with inconsistent glue lines on your folding gluing machine? Contact Rolam for a remote glue system diagnostic. Provide your machine model (SP SERIES or other), glue type, board material, and the pattern of the inconsistency. Their technical support team can guide you through specific adjustments and recommend replacement parts if needed.